
A bag of loose yerba mate, a cup and a bombilla are enough to begin. The unfamiliar part is the way you use them: build a sloping bed of yerba, pour into one small area, then refill the same leaves as you drink. Your first mate does not need a perfect mountain or an elaborate setup. It needs a comfortable cup, a clear place to pour and a little attention to the water.
We suggest starting with a small, unhurried session. Prepare one cup, taste the early pours and notice how the flavor changes. You can adjust the taste as you go, try a kitchen brewer and keep your equipment ready for tomorrow.
Choose the way you want to drink
Traditional mate is a series of small pours through the same bed of yerba. A bombilla is the metal drinking straw with a filter at its lower end. The leaves stay in the cup while you drink the liquid through it. A thermos keeps water close by, so the session can continue without returning to the kettle.
A mug with an infuser gives you a different routine: steep, remove the leaves and drink. A French press works much the same way, with room to prepare more than one mug. Neither requires a bombilla. Choose the traditional method when you want to learn the pouring rhythm; choose a kitchen brewer when you want one cup to take to the table.
| Method | What you need | What to expect |
|---|---|---|
| Traditional hot mate | Mate cup, bombilla and hot water | Small refills and a flavor that changes through the session |
| Infuser mug | Mug and roomy fine-mesh infuser | A single strained cup with an easy stopping point |
| French press | Clean press and a separate serving cup | A measured batch you pour off the leaves |
| Cold mate | Suitable cup, bombilla, cold water and ice | A cold pouring method that may need a different grind or filter |
Use the same yerba for your first few hot preparations so you can learn what the method changes. Browse our yerba mate selection if you are still choosing a pack, or begin with CRUZ DE MALTA Traditional 1 kg.
Set out a small, workable kit
Start with a cup that stands securely and feels comfortable in your hand. A wide opening makes it easier to see the dry slope and direct a narrow stream of water. Cup size matters: filling a large vessel two-thirds full uses much more yerba than filling a small one to the same level. For a first session alone, a modest cup makes preparation easier to manage.
Check what the cup is made from before its first use. A natural calabash or wooden mate may need preparation specified by its maker. Glass, ceramic and stainless steel have different care requirements. The word “gourd” is often used loosely for the drinking vessel, so read the material description rather than assuming every cup is a dried plant shell.
Choose a bombilla whose filter fits inside the base without crowding the cup. Its mouthpiece should sit at a comfortable height above the rim. A very long straw in a short cup can feel awkward; a short one in a deep cup can leave too little room to drink. Check whether it comes apart for cleaning before you buy a replacement or accessory.
You will also need a kettle, clean drinking water and a way to check its temperature. A temperature-controlled kettle is convenient, but a suitable kitchen thermometer can do the same job. If you use a thermos, make sure its lid pours a controlled stream. A tray or washable mat catches the few dry leaves that may escape while you learn to fill and tilt the cup.
Prepare your first traditional mate
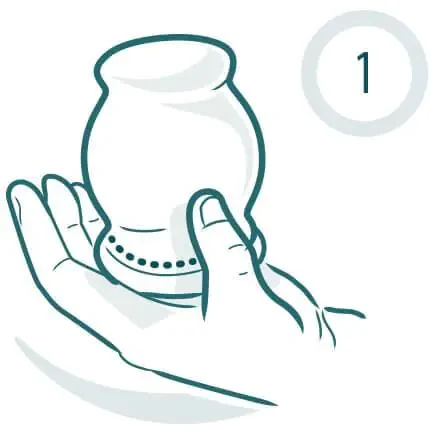
The CRUZ DE MALTA preparation method gives you a clear starting sequence: fill the cup two-thirds full, cover and shake it, leave the yerba tilted to one side, moisten the lower side with warm water and place the bombilla there. Use water at 75°C, or 167°F, for the hot pours. That is a brewing-water temperature, not an instruction to drink immediately. Allow the prepared drink to cool before sipping.
Make room for the water
Put dry yerba in a clean, dry cup. Cover the opening securely with your palm before shaking, then return the cup to an angle so the yerba rests higher on one side. When you set it upright, look for a lower area beside the slope. This is your pouring space. Work over a tray if your hand does not cover the opening comfortably.
Leave a pocket you can reach easily with the water spout. If the slope slumps a little, make a smaller first pour and continue. Repeatedly tipping the cup after adding water is more likely to make a mess than to improve the shape. A simple arrangement you can pour into is enough to learn the technique.
Place the bombilla once
Add a little warm water to the lower area and let the yerba absorb it. Set the filter end of the bombilla into that moistened space, with the mouthpiece positioned where you can reach it comfortably. Establish its position before the hot pours begin. Avoid using it as a spoon to stir the leaves.
Pour a small amount of the prepared hot water near the bombilla. Watch where the stream lands. A narrow, gentle pour gives you more control than emptying a full kettle spout into the center of the cup. Leave room below the rim so you can move the vessel without spilling.
Learn the refill rhythm
Once the drink has cooled enough, sip through the bombilla. Pour again into the same lower area when you are ready. You do not need to replace the dry yerba after every pour. Keep the thermos within easy reach and set the mate down on a steady surface while refilling.
The Argentine yerba mate institute's preparation guide also recommends small pours beside the bombilla while keeping the upper yerba dry. Think of the cup as a session you prepare gradually. Flooding the entire surface on the first pour makes it harder to control how the bed develops.
Give the first pours a fair chance
Start by tasting the mate plain. If your reference point is sweet bottled tea, an unsweetened infusion may seem unfamiliar even when the preparation is working. Notice whether you enjoy the flavor itself, whether the liquid feels too intense or whether it is simply too hot to taste comfortably. Those are separate questions, and each calls for a different adjustment.
You do not have to finish a thermos or reach a set number of refills. Stop when you have had enough. A traditional session is not a fixed serving size, and the amount of water you use is not the same thing as the amount of dry yerba in the cup. Keeping those two quantities separate will also help when you plan your next pack.
For a useful comparison tomorrow, remember just three details: which cup you used, how much you filled it and your water setting. A brief note such as “small steel cup, two-thirds full, gentler second pour” is more helpful than trying to score every sip. Change one part of the preparation next time, then decide whether you prefer it.
Adjust flavor without rebuilding everything
If the first sip feels too forceful
Let it cool before judging the flavor. Then check the kettle setting rather than guessing from steam. If you have been pouring boiling water, return to the brand's brewing guidance. For the next session, choose a smaller cup if the overall amount of mate feels too much. This reduces the dry quantity while letting you practice the same traditional filling method.
If you want a gentler single mug with a clear recipe, try the infuser method below. Measuring a small amount of loose yerba into a separate brewer lets you compare different steeping times more directly. You can return to the gourd once you have a better sense of the taste you like.
If a later refill tastes faint
Flavor changes as you continue pouring. A mild refill near the end does not mean the original packet was weak. In its advice on preserving flavor, the Argentine institute describes mate that has lost its taste as “lavado.” When the cup no longer tastes enjoyable, empty it and prepare fresh yerba if you want another session.
For the next preparation, pay attention to the size and location of your pours. It is easier to observe the effect of smaller pours than to rescue an already exhausted cup by changing several things at once.
If you prefer a little sweetness
Taste the plain drink first, then add a small amount of your preferred sweetener to a separately strained cup. That makes the amount easier to judge and keeps the main preparation unchanged. If you add fruit or mint, begin with one addition. Otherwise, you may enjoy the result without knowing which ingredient made it work.
When the bombilla is hard to draw through
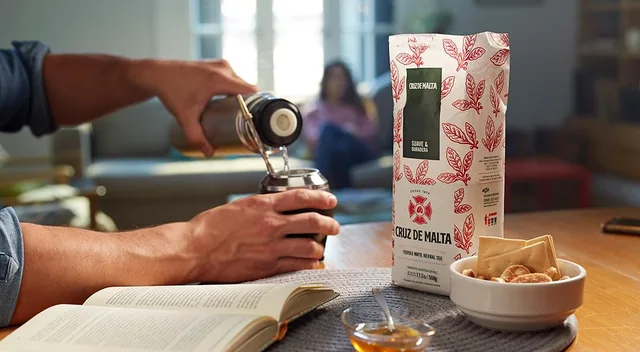
A restricted flow is a practical problem, not a reason to pull harder on the straw. Stop drinking, set the cup down and let the contents cool before handling the filter end. Check whether the bombilla has become buried awkwardly or whether leaf material is blocking its openings. Do not handle a hot metal straw at its submerged end.
If a gentle reposition does not help, empty the cup and clean the bombilla. Starting again is often easier than repeatedly stirring a crowded bed of wet yerba. Rinse through the tube and inspect the filter where you can see it. A small brush designed for the opening can help reach residue, provided it suits the manufacturer's cleaning instructions.
For the next cup, mix the dry yerba before setting the slope and choose the bombilla position carefully. The institute's bombilla guidance emphasizes mixing the leaves, stems and fine particles rather than trying to remove all the powder. It also recommends washing the bombilla after use. Do not assume a blocked straw means the yerba needs to be sifted.
A mug or French press works, too
If you already have a fine-mesh tea infuser, begin there before buying a complete mate set. Choose a basket with enough space for the loose yerba and water to move. A tiny tea ball packed tightly makes filling and cleanup more awkward, particularly when fine particles are present.
For an introductory kitchen-brewer trial, use one level tablespoon of loose yerba per 8 fluid ounces of water, then taste after about two minutes. These are adjustable starting proportions, not a CRUZ DE MALTA package instruction. A fellow mate producer, TOMA, describes a tablespoon-per-cup French press method; the shorter trial here gives you a simple point from which to adjust your next batch.
With an infuser, remove the basket when the flavor suits you. With a French press, lower the plunger gently and pour the infusion into a separate mug or heat-safe serving vessel. Leaving liquid in contact with the leaves makes your final cup different from the first, which complicates any comparison you are trying to make.
Use a clean press that has been rinsed thoroughly. Old coffee residue can distract from the flavor you are trying to learn. If fine particles pass through the mesh, you can pour through a suitable fine strainer. Follow the press maker's instructions for its glass, plunger and cleaning parts.
Adjust only the amount of yerba or the steeping time on the next trial. For example, keep the water and tablespoon measure the same but strain a little later. Once you find a proportion you like, measure your usual mug: a large desk mug may hold considerably more than 8 fluid ounces.
Cold mate and iced mate are different preparations
Tereré uses cold water poured through yerba in a cup with a bombilla. Iced mate can begin as a strained hot infusion that you cool and serve over ice. Both give you a cold drink, but they use different equipment and sequences. Decide which one you want before filling the kettle or assembling a gourd.
For tereré, the Argentine institute recommends cold water, ice, a suitable vessel and a bombilla. It notes that coarser yerba with fewer fine particles helps avoid blockage, and traditional yerba can be more prone to clogging in cold preparation. If your current bombilla struggles with a cold cup, a strained iced infusion is a practical alternative.
To try iced mate with familiar kitchen equipment, prepare a small infuser or French press batch, remove the leaves and let it cool before serving over ice. Use a container suitable for the temperature change. Taste after the ice begins to melt; the added water changes the strength. Record the amount of ice as well as the amount of brewing water if you want to repeat the result.
A squeeze of citrus or a little fresh mint is an optional flavor choice. Add it to the serving glass so you can compare it with the plain drink. Keep fruit, sweeteners and flavored liquids out of equipment whose maker recommends water only, and wash everything promptly after the session.
Finish with a clean cup and a dry storage space
When the session ends, empty the used yerba instead of leaving a wet cup on the counter until the next day. A spoon can help lift the bulk out without forcing it down the drain. Rinse the vessel and follow its material-specific cleaning directions. Do not apply one cleaning recipe to a natural gourd, a wooden cup and a dishwasher-safe steel vessel.
Let the cup dry thoroughly in a ventilated place. If a natural gourd needs curing, follow the maker's process before brewing in it. Avoid improvising with bleach, prolonged soaking or boiling unless those treatments are expressly allowed for that product. If you see suspected mold, stop using the vessel and seek its maker's care advice.
Rinse the bombilla's tube and filter after each session. Where the design allows disassembly, keep the small pieces together while cleaning and check that they are secure when you put it back together. Deep cleaning depends on its material, finishes and seals; a method suitable for an uncoated metal straw may not suit every decorative or multipart design.
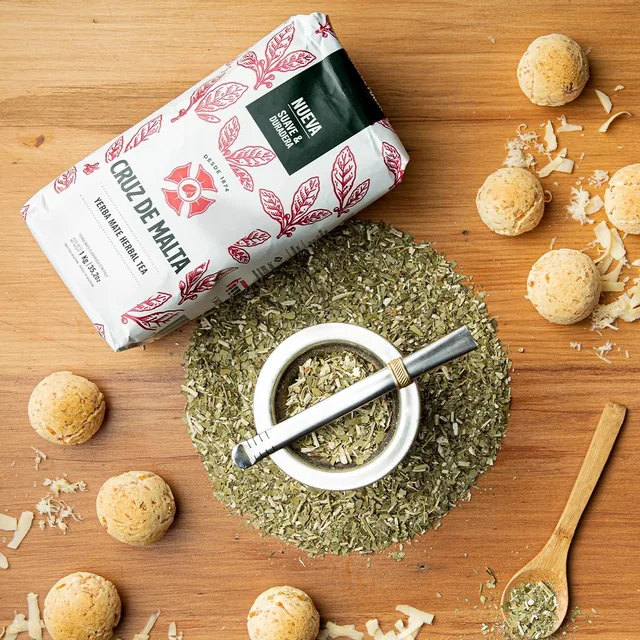
Close the dry yerba packet carefully and keep it in a cool, dry cupboard away from strong cooking odors. A clean, dry, airtight food container can make an opened bag easier to handle. Keep the package label with it so the product name, date and any storage instructions remain available. Use a dry scoop, and never return wet leaves to the stored supply.
Plan a pack around your actual routine
A 1 kg bag contains 1,000 grams of dry yerba. How many sessions it provides depends on the quantity you put in the cup each time, not on the number of refills. Weigh one normal fill if you want a useful estimate. Subtract the empty cup's weight so you are measuring only the yerba.
For example, a measured 40-gram fill gives 25 theoretical fills from 1,000 grams. A 25-gram fill gives 40. These figures are arithmetic examples, not recommended serving sizes or a promised yield. Spills and the amount left in the package also affect what you actually get from a bag.
Multiply your measured fill by the sessions you expect to prepare each week before choosing a larger pack. Keep unopened bags closed until you need them, and check the package dates when they arrive. If you are still exploring different methods, one bag gives you room to learn your routine before committing cupboard space to several.
View the Traditional 1 kg pack for the product details, or visit help if you need guidance on choosing an option or finding an existing order.
Choose your first bag
The 500 g bag gives you a smaller starting amount. The 1 kg bag suits a regular mate routine.
Compare single bags